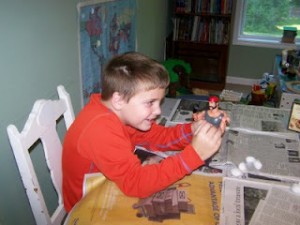
We had to throw our chicken mummy away last week, since our stay at the hospital meant he didn’t get the care he needed in a timely fashion! So today we learned about mummification using a method that didn’t require the use of gloves, masks or even air freshener!
I got four male dolls at a garage sale and instructions from one of my favorite crafty homeschool sites. One doll even had a leg that kept falling off, but it didn’t matter for our purposes! If you have girls, feel free to use a Barbie!
1) We talked about the internal organs and drew a red heart on each doll to signify the fact that the Egyptians mummified the heart separately and then placed it back inside the body.
2) Next, we wiped the bodies down with “wine”. For this step, we used equal parts water and white wine vinegar, and a cotton ball to apply it to the dolls.
Knox thought it was funny to give his Hulk Hogan doll a bath. I’m glad to see him so happy!
3) Then, we used a clean cotton ball to wipe the bodies down with a mixture of olive oil and cinnamon.
4) Then the bodies were sprinkled with Kosher salt.
5) We set the bodies aside to dry. This isn’t strictly necessary in my opinion. The site where I got these instructions said that they let theirs dry for 40 minutes, to symbolize the 40 days it took to mummify a body. The dolls need to be cleaned before wrapping anyway, so you could skip this step.
6) While the dolls were drying we cut out amulets from fun foam to place inside the wrappings.
We also tore the fabric strips we would need for the wrapping. I was not strict about getting muslin, as it was not cheap.
I just got several pieces of white or off white remnant fabric. We cut the strips about one inch wide…once a cut was started they could easily be ripped the rest of the way by hand. That was, by far, the fastest way to tear the strips. We saved a bit of fabric for covering the heads and feet of the dolls (see step 8).
7) In Ancient Egypt, of course, the bodies weren’t washed again before wrapping, but the dolls were really greasy from the olive oil and yucky from all the salt. I washed the dolls and dried them with paper towels before the next step.
8) I read on this site that it is easiest to do the wrapping if you cut out a large square of fabric for the head and another for the feet and attach the squares with rubberbands.
By the way, that same site has instructions for making a mummy out of tinfoil which mimics the shape of a Barbie but doesn’t ruin the doll. They also tell you how to dye the linen strips in two different strengths of hot tea to mimic more natural mummy coloring.
I thought about using the tea for a few minutes, but reminded myself: this is supposed to be relatively quick and easy. It doesn’t have to be museum quality, Molly!
9) We just dipped each strip in a paste made of one part flour to three parts water and wound the strips around the dolls.
Of course, three year old Cal insisted on doing his all by himself!
10) We just did this today, but I believe it takes a day or two for the dolls to dry.
One of the boys refused to use the paste on his linen strips. He didn’t want to ruin his doll, even though none of my boys has ever played with G.I. Joe type dolls. Can you tell which one isn’t truly mummified?
This was a fun activity. We all enjoyed it! As three year old Cal was placing his completed mummy on the table to dry he said, “This was great, mom!! This was really great!!”

Hi Molly!
My ds loves the mummy pictures. I wrote about this post on my blog. Go check it out.
http://www.homeschoolblogger.com/quilt2day
Glad Knox is doing better…we’ve been praying for him!
I’m a grade 3 and 4 teacher in Winnipeg MB and am going to use this idea with my students. Thanks!
I remember reading this when you first posted it, and I got a kick out of it the second time around too. Thanks for the submission to the History Buffs carnival. Any great plans for summer? Have a great week!